They pretty much speak for themselves...
Showing posts with label five star stories. Show all posts
Showing posts with label five star stories. Show all posts
Tuesday, December 23, 2008
A-Taul from L-Gaim from Start to Finish
It'll take you a little over a half an hour to get through these, but I found out how to embed them in high quality, and they're all edited and stuff, so I imagine it could be time well spent if you like this sort of thing.
They pretty much speak for themselves...
They pretty much speak for themselves...
Monday, April 14, 2008
detailing my new bike
Pictures are way too big right now, I hope to fix them later. Sorry.
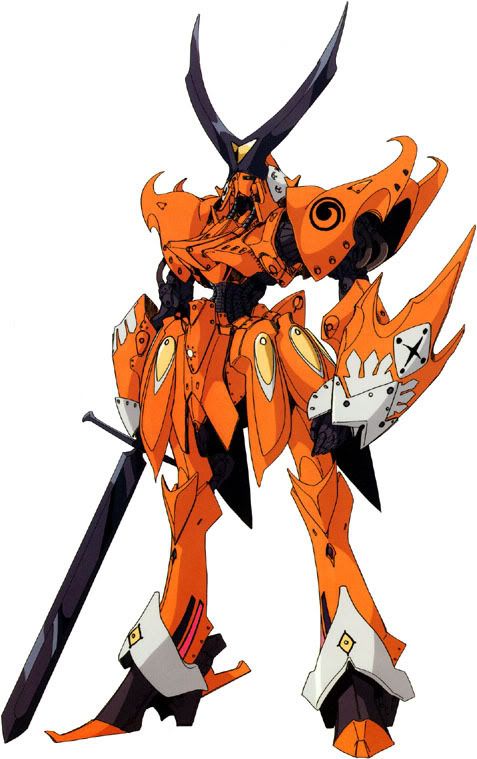
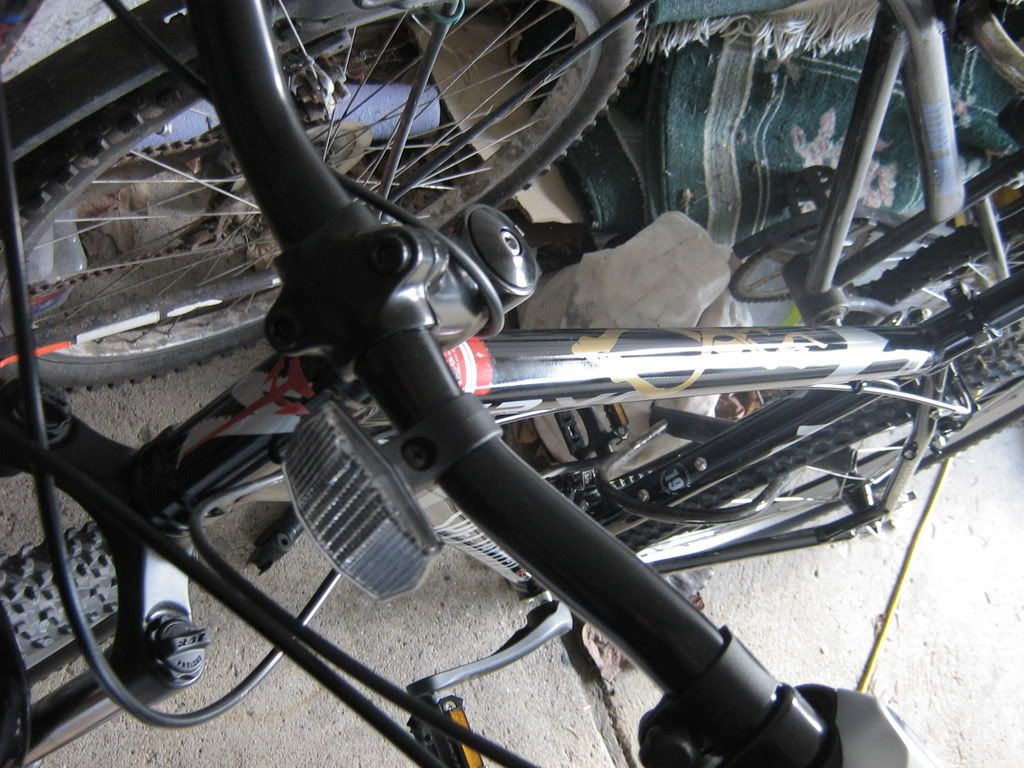
I bought a new mountain bike last week. Just an "entry level" Specialized, and it was last year's model (that kind of consumerist stuff cracks me up) so I got a nice deal on it. But beggars can't be choosers and it's basically got a boring black and silver paint job, so I thought I'd spice it up a bit with some Five Star Stories related detailing. Going through my reference books, I thought I might do a V-Siren Prominence deal on it - all that orange, gold, and black would look awesome.
But alas I have neither the time nor the skill necessary to tear down an entire bike to do a full repaint at this point in my painting and biking career.
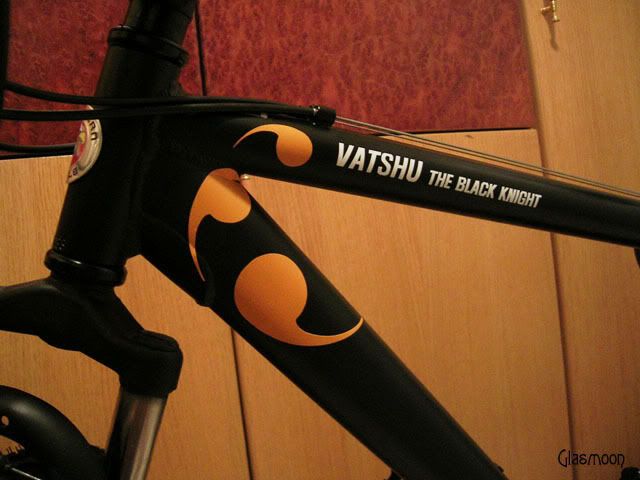
Didn't want to do a Vatshu scheme, mainly since I've seen it done before.
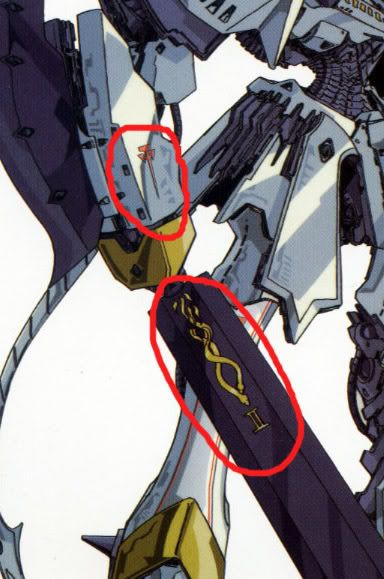
So then I checked out the Phantoms, and the Mighty series because I knew there were some black mechs in that territory. I decided on the Hydra Mirage.
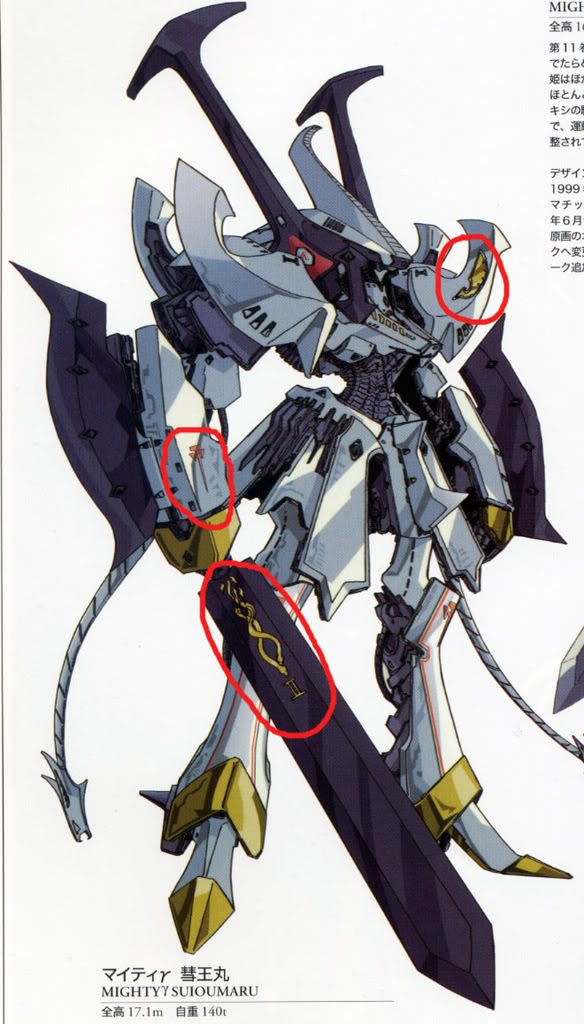
I love the AKD cross, and I think serpents and wings are very appropriate for bike details. My son was also born in the Chinese Zodiac year of the snake/serpent, so I get a little homage to him in that way too.
So far I've got the cross and serpents done.
Here's how...
I spent the first evening just doing drawings. The serpents were the hardest to replicate, but I'm glad I invested in a copy of Knight Flags when it came out several years ago. Those huge (roughly tabloid sized) volumes from the Characters series are excellent for detail and color reference.
I wasted a bunch of time imagining that I could save time and effort photoshopping and/or illustratoring the images and then getting vinyl stickers printed. I guess it was a learning experience, but the main thing I learned was that I'm better with analog art supplies than with digital ones. So airbrushing the designs was going to be the way for sure.
But how to mask for such complicated designs???
After searching around town for airbrushing frisket film, and then I lucked into finding this stuff:
I have to say that I am exquisitely pleased with how it works (it could be a little cheaper, but oh well). I don't know if it would be as fantastic for smaller projects, but for this it was amazing.
I did the AKD cross first, and after a number of false starts (do not try to cut out a design and then apply the cut film to your surface, you must apply the film first and then cut and peel the areas that will take the paint) I finally traced the shape onto the film with an opaque paint pen (Sharpie wouldn't stick to the film well and the transparency of the ink made it impossible to see the cutting lines), applied the film and then cut out the design. I'm glad I used a simple design to start with, it lowered my level of frustration considerably to make mistakes that each took a relatively small amount of time.
I sprayed a layer of Testors base white lacquer so the cross would pop nicely. Then I mixed up a custom color from Testors Gloss clear coat, Pearl-Ex Super Russet pearl powder, and a drop of Mr Color red and sprayed that over the white. I think I went a little heavier with it than I needed to, but after letting it cure for an hour or so I cut around the design so that the edges of the paint wouldn't tear and flake, lifted the making film, and gave it a final gloss clear coat.
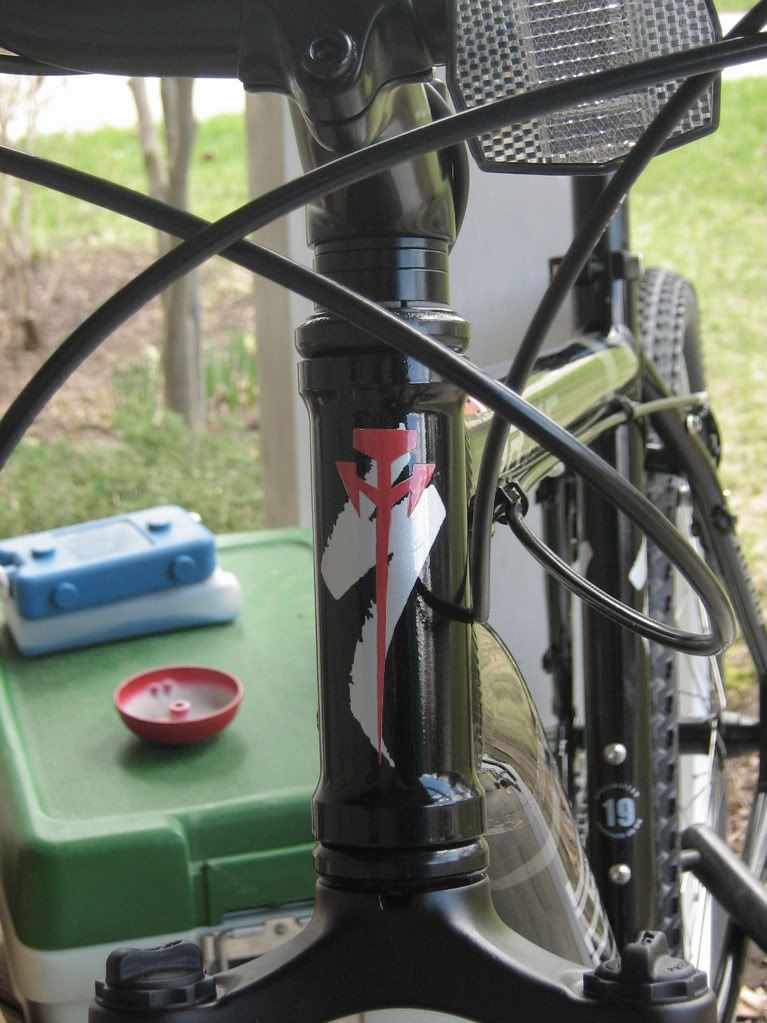
Good enough.
On to the snakes.
With this design I discovered something amazing about this masking film: it sticks firmly onto inkjet printer paper so that one can very readily trace any printed lines, and then the film lifts cleanly off the paper without peeling shards of paper up and with full retention of its ability to adhere to the glossy surface of the bike frame.
This process yielded the following result:
Then I carefully cut inside the traced lines with a sharp hobby knife and peeled up the areas that needed to take the paint. I went much lighter with the paint this time around, mainly because I didn't want to have to cut around the design before lifting the film. The mix was simply gloss clear lacquer and Pearl-Ex antique gold ( I accidentally lied about the paint in the VO narration) sprayed at low pressure - around 10 PSI I think.
Here are two videos showing the result:
And a few images:
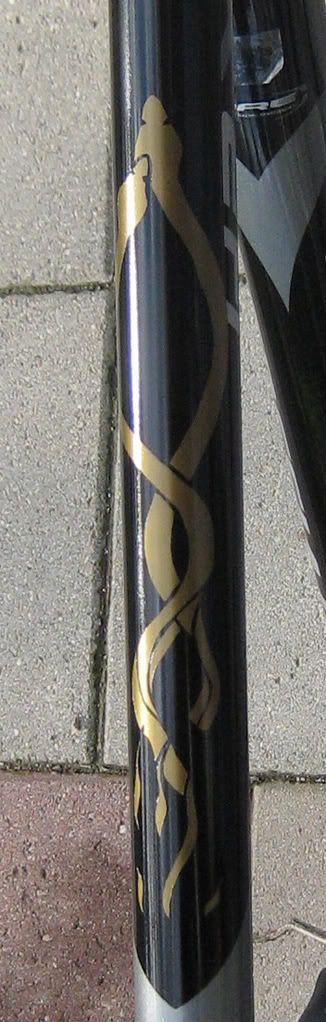
I'll try to get the wings on ASAP.
I bought a new mountain bike last week. Just an "entry level" Specialized, and it was last year's model (that kind of consumerist stuff cracks me up) so I got a nice deal on it. But beggars can't be choosers and it's basically got a boring black and silver paint job, so I thought I'd spice it up a bit with some Five Star Stories related detailing. Going through my reference books, I thought I might do a V-Siren Prominence deal on it - all that orange, gold, and black would look awesome.

But alas I have neither the time nor the skill necessary to tear down an entire bike to do a full repaint at this point in my painting and biking career.
Didn't want to do a Vatshu scheme, mainly since I've seen it done before.

So then I checked out the Phantoms, and the Mighty series because I knew there were some black mechs in that territory. I decided on the Hydra Mirage.

I love the AKD cross, and I think serpents and wings are very appropriate for bike details. My son was also born in the Chinese Zodiac year of the snake/serpent, so I get a little homage to him in that way too.
So far I've got the cross and serpents done.

Here's how...
I spent the first evening just doing drawings. The serpents were the hardest to replicate, but I'm glad I invested in a copy of Knight Flags when it came out several years ago. Those huge (roughly tabloid sized) volumes from the Characters series are excellent for detail and color reference.
I wasted a bunch of time imagining that I could save time and effort photoshopping and/or illustratoring the images and then getting vinyl stickers printed. I guess it was a learning experience, but the main thing I learned was that I'm better with analog art supplies than with digital ones. So airbrushing the designs was going to be the way for sure.
But how to mask for such complicated designs???
After searching around town for airbrushing frisket film, and then I lucked into finding this stuff:

I have to say that I am exquisitely pleased with how it works (it could be a little cheaper, but oh well). I don't know if it would be as fantastic for smaller projects, but for this it was amazing.
I did the AKD cross first, and after a number of false starts (do not try to cut out a design and then apply the cut film to your surface, you must apply the film first and then cut and peel the areas that will take the paint) I finally traced the shape onto the film with an opaque paint pen (Sharpie wouldn't stick to the film well and the transparency of the ink made it impossible to see the cutting lines), applied the film and then cut out the design. I'm glad I used a simple design to start with, it lowered my level of frustration considerably to make mistakes that each took a relatively small amount of time.
I sprayed a layer of Testors base white lacquer so the cross would pop nicely. Then I mixed up a custom color from Testors Gloss clear coat, Pearl-Ex Super Russet pearl powder, and a drop of Mr Color red and sprayed that over the white. I think I went a little heavier with it than I needed to, but after letting it cure for an hour or so I cut around the design so that the edges of the paint wouldn't tear and flake, lifted the making film, and gave it a final gloss clear coat.

Good enough.
On to the snakes.
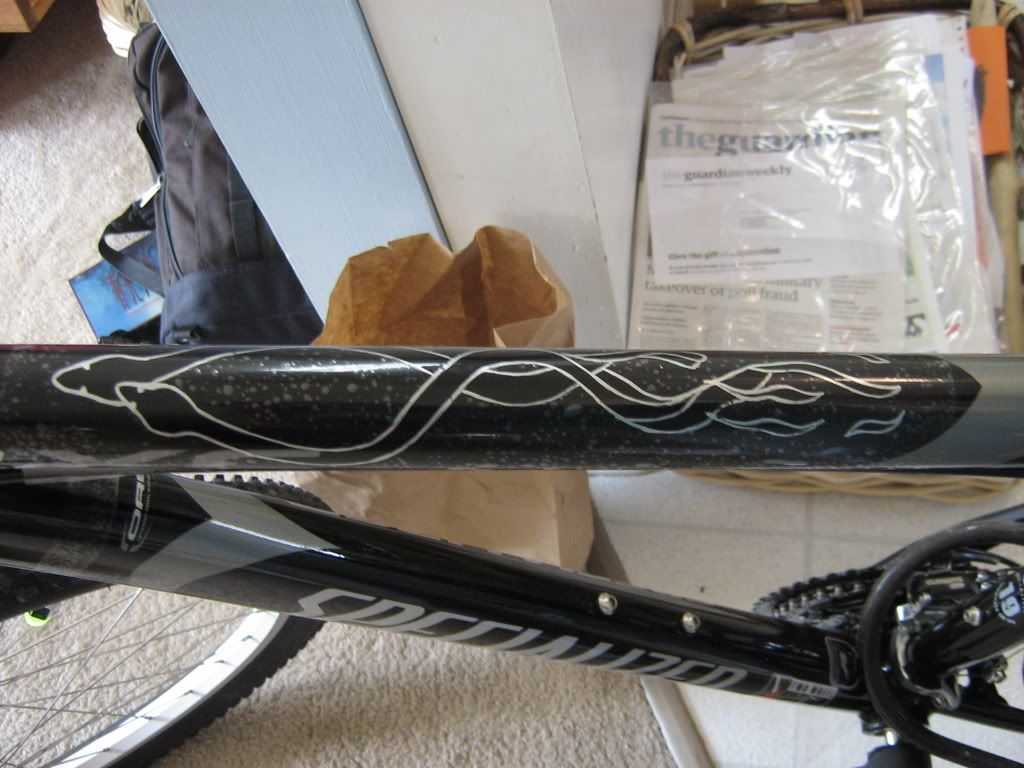
With this design I discovered something amazing about this masking film: it sticks firmly onto inkjet printer paper so that one can very readily trace any printed lines, and then the film lifts cleanly off the paper without peeling shards of paper up and with full retention of its ability to adhere to the glossy surface of the bike frame.
This process yielded the following result:

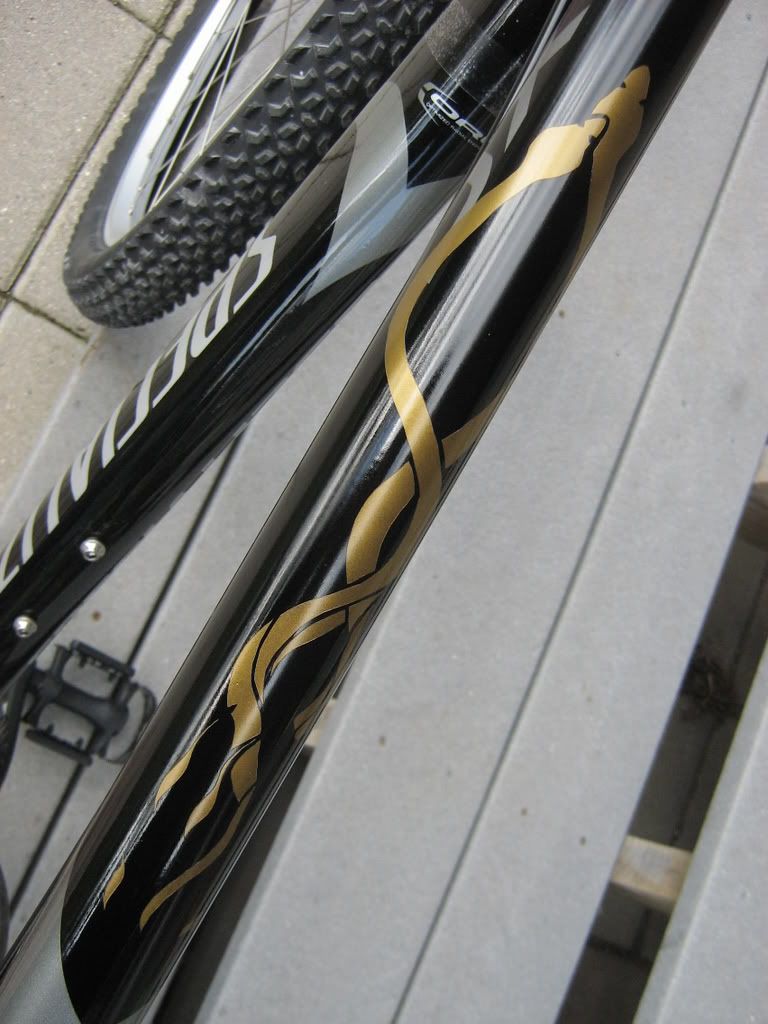
Then I carefully cut inside the traced lines with a sharp hobby knife and peeled up the areas that needed to take the paint. I went much lighter with the paint this time around, mainly because I didn't want to have to cut around the design before lifting the film. The mix was simply gloss clear lacquer and Pearl-Ex antique gold ( I accidentally lied about the paint in the VO narration) sprayed at low pressure - around 10 PSI I think.
Here are two videos showing the result:
And a few images:


I'll try to get the wings on ASAP.
Friday, January 18, 2008
Saturday, January 5, 2008
D-Sserd build begins
I'm getting a group L-Gaim build together over at the best modelers community online.
This is my entry: an old Bandai 1/144 D-Sserd.

Here are the first parts I've put together:

Here's a video of those same parts:
And here's a noisy video of me priming the arm with Mr. Surfacer 1000:
And here's a shot of the first three parts all primed:

This is my entry: an old Bandai 1/144 D-Sserd.

Here are the first parts I've put together:

Here's a video of those same parts:
And here's a noisy video of me priming the arm with Mr. Surfacer 1000:
And here's a shot of the first three parts all primed:

Wednesday, October 31, 2007


Friday, July 13, 2007
Volks 1/100 Helmine

I got this kit from Yahoo Japan Auctions by way of the proxy bidding and "deputy" service website Shopping Mall Japan in the neighboring state of Indiana. Including all the service and shipping fees it cost just over $250.
This is the front page of the typically bare-bones instruction sheet.

And here's a picture of all its 47 parts laid out in the classic resin kit part layout "pose."

I'm not entirely sure whether or not this kit was worth all the money I paid, but I do like the design which is a kind of Five Star Stories "cousin" to the Gundam known as Qubeley.

Since the kit is about 20 years old, it is a pretty bad cast. Lots of pinholes or bubbles that were trapped and hardened into the plastic resin. Some mold misalignment causing damage to details or the design of the original sculpt. Some bigger bubbles that just completely wiped out details.
Those who know me, however, will know that I (perhaps perversely) enjoy repairing and resculpting parts on bad kits to make them better. This is what I will be doing in this case, and now I will take it a step further and re-cast the kit when the parts are up to standards that should improve considerably upon the original. I don't feel like I'm stepping on anyone's marketplace toes with this. The kit is really old, as I said, and very few people even know that it exists at all.
I'm well into the repair process already and I want to share some of it with you.
First up is a youtube video of before and after work on the big shoulder armors:
Next are before and after pics of repair I did to the point of the helmet's horn which was lost in the casting process:


Here is a video of the process for the resculpt.
[Edit] BTW I just found out that I've been mispronouncing the name "Helmine." It is German (duh to self) and short for Wilhelmine so it should be pronounced as "hell-mee-nuh". It means "the resolute protector" which I think is nice.
Monday, June 4, 2007
Finally figured out the foot detail casting!
After my first attempt went awry thanks mainly to resin that was well-past its expiration date, I decided to make a new mold with RTV.
Here's the mold box getting started. I've just roughly lumped in the Kleen Clay to hold the part in position so that it is level in the box, and has enough space on all sides to make a good solid mold. I've tried to estimate a good volume of clay so that as I smooth it out the level will rise nicely to just below the edges of the part.

Using this set of tools:

from here (click on the "set of 12" thumbnail, it's the better set but has no direct link), I smoothed out the clay and worked it up snug against the edges of the part and the walls of the box. The RTV (Room Temperature Vulcanizing) rubber will work its way into the smallest spaces so a good seal is necessary. After that I built up the walls of the box with another row of bricks and laid in a thin snake of clay around the walls to raise the level a little more there.

Then I added one more layer of Legos so the RTV has enough space.

Here's the demolded RTV. I didn't use any mold release, which was fine in this case. I was nervous tho' because I did that by accident, not on purpose.

For the casting, I decided to use Bondo auto body repair filler. I was inspired to do this by a Brazilian figure sculptor on Hobbyfanatics named Ryuji who uses this stuff all the time. It's way cheaper than urethane or epoxy resins and the supply is much handier at the auto supply store (casting resin is a bit hard to find, even on the internet). I did spray mold release before spreading the Bondo into the mold.

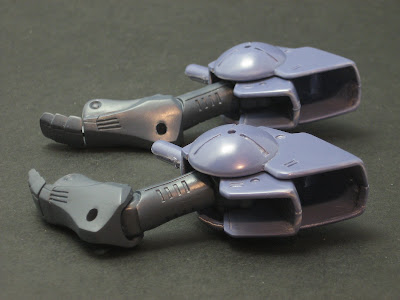
The first one I did wasn't even worth showing because the working time on this Bondo stuff is only about a minute, which came as a big surprise and ruined the first attempt. This is the second attempt:

There are too many defects in this part to make it worth using on the final product, so I tried a few more times.
Here's what I came up with. The second and fourth ones are fine.

Now I just have to trim it up and smooth out the flat backside so I can fix it onto the flat foot and the prime and paint.
Wish me luck!
Here's the mold box getting started. I've just roughly lumped in the Kleen Clay to hold the part in position so that it is level in the box, and has enough space on all sides to make a good solid mold. I've tried to estimate a good volume of clay so that as I smooth it out the level will rise nicely to just below the edges of the part.

Using this set of tools:

from here (click on the "set of 12" thumbnail, it's the better set but has no direct link), I smoothed out the clay and worked it up snug against the edges of the part and the walls of the box. The RTV (Room Temperature Vulcanizing) rubber will work its way into the smallest spaces so a good seal is necessary. After that I built up the walls of the box with another row of bricks and laid in a thin snake of clay around the walls to raise the level a little more there.

Then I added one more layer of Legos so the RTV has enough space.

Here's the demolded RTV. I didn't use any mold release, which was fine in this case. I was nervous tho' because I did that by accident, not on purpose.

For the casting, I decided to use Bondo auto body repair filler. I was inspired to do this by a Brazilian figure sculptor on Hobbyfanatics named Ryuji who uses this stuff all the time. It's way cheaper than urethane or epoxy resins and the supply is much handier at the auto supply store (casting resin is a bit hard to find, even on the internet). I did spray mold release before spreading the Bondo into the mold.

The first one I did wasn't even worth showing because the working time on this Bondo stuff is only about a minute, which came as a big surprise and ruined the first attempt. This is the second attempt:

There are too many defects in this part to make it worth using on the final product, so I tried a few more times.
Here's what I came up with. The second and fourth ones are fine.

Now I just have to trim it up and smooth out the flat backside so I can fix it onto the flat foot and the prime and paint.
Wish me luck!
Wednesday, May 30, 2007
Vatshu Ankle Joint Modifications
I'll break it down for you. First I carved out some of the plastic that was there to hold the original stupid poly cap:

Until the new socket PC fit nicely, but loosely at the level where I wanted it:

Then I laid down a little "pad" of Magic Sculp epoxy putty for the new PC to press into:

And after the PC was mounted at the right depth and angle, I filled in the surrounding area with more Magic Sculp using clay sculpting tools to press and work it smoothly into place:

These are the "ankle bones" that connect the top of the foot to the bottom of the leg:

So now the ankles will be essentially double jointed.
Look at these videos for a more well-rounded view of all the action (ignore the sound, please):
Once again the main idea here is that test fitting is of the utmost importance in Garage Kit building. Even more so if you want to do modifications.
Saturday, May 5, 2007
More on Vatshu
I got the shoulder armor cleanup done.
First the inside of that piece from the last post:
And around the edges:
I got the final priming and sanding done on the smaller inner layer of shoulder armor too. I feel like I'm finally getting a handle on this whole elimination of seams thing.
Here's an animated gif of those inner armors:
I don't know if the gif will work, so here are the individual images:


First the inside of that piece from the last post:
And around the edges:
I got the final priming and sanding done on the smaller inner layer of shoulder armor too. I feel like I'm finally getting a handle on this whole elimination of seams thing.
Here's an animated gif of those inner armors:

I don't know if the gif will work, so here are the individual images:


Thursday, May 3, 2007
Vatshu cleanup
Working on the shoulder armors.

I realized that the insides of these big panels were hugely exposed and needed smoothing out. Lucky for me I hadn't glued them together yet (hooray for test fitting). Here's what I'm talking about:
If you look inside there you can see little circles, pointed out on the right side in this pic (you might need to angle your monitor down to see it):
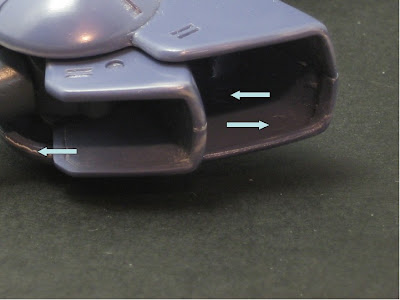
The arrow on the left is pointing out a rough edge I'll need to polish too.
On this pic you can see what this part looks like before and after smoothing out:

and here's a little movie, with actual narration no less, that shows you how to quickly and relatively painlessly clean up parts that show their "wrong" sides like this and other shoulder armors so often do:
Even if I was doing "no-paint" this would look good now. But I'm painting this time around, so stay tuned :)

I realized that the insides of these big panels were hugely exposed and needed smoothing out. Lucky for me I hadn't glued them together yet (hooray for test fitting). Here's what I'm talking about:

If you look inside there you can see little circles, pointed out on the right side in this pic (you might need to angle your monitor down to see it):

The arrow on the left is pointing out a rough edge I'll need to polish too.
On this pic you can see what this part looks like before and after smoothing out:

and here's a little movie, with actual narration no less, that shows you how to quickly and relatively painlessly clean up parts that show their "wrong" sides like this and other shoulder armors so often do:
Even if I was doing "no-paint" this would look good now. But I'm painting this time around, so stay tuned :)
Monday, April 16, 2007
Sunday, April 1, 2007
Detailing on the KOG
Here's a few pictures of some detailing I did on my KOG Joker 3100 Gold Plated Edition last night. I tried to do this with an acrylic wash over a layer of gloss coat. Lucky I tried that on just a small section of the top of the head, because cleaning up the wash with an alcohol swab nearly had disastrous results in that it started ripping chunks of the clear orange acrylic off from on top of the chrome plate.
I was lucky enough to be able to grab an extra fine point black Gundam marker at a hobby shop yesterday and that did the trick.
Have other people had trouble keeping these markers flowing properly? I had to keep a note card next to me to blot the pen tip regularly.


I was lucky enough to be able to grab an extra fine point black Gundam marker at a hobby shop yesterday and that did the trick.
Have other people had trouble keeping these markers flowing properly? I had to keep a note card next to me to blot the pen tip regularly.


Sunday, March 25, 2007
Vatshu marches on
Here's a few more illustrations of the Vatshu project
Adding the inner shoulder joint.
This is the rather large gap between the parts caused by inserting the poly cap (notice that the parts are also misaligned, again because of the poly cap):

This is the two halves split apart and the dremel bit I used to open up the poly cap bracket just a bit (taking care to do so in such that the parts will align better too):

Then the halves fit much better, but now there's a problem in that this sub-assembly fits too tightly onto the top of the upper arm. This hole needs to be a nice clean circular one, not a ragged oval:
So here's a little clip of me rolling up a tiny snippet of sand paper to reshape the hole:
Inserting the tube into the hole to smooth it out:
At last, done with all the test-fitting and touch-ups:
So I can glue stuff together:
Subscribe to:
Posts (Atom)