Showing posts with label Vatshu. Show all posts

Monday, June 4, 2007

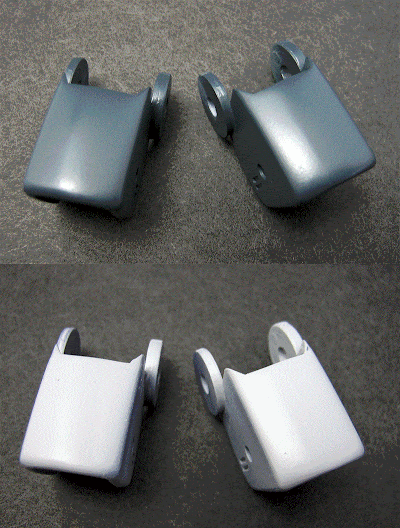
Finally figured out the foot detail casting!

After my first attempt went awry thanks mainly to resin that was well-past its expiration date, I decided to make a new mold with RTV.

Here's the mold box getting started. I've just roughly lumped in the Kleen Clay to hold the part in position so that it is level in the box, and has enough space on all sides to make a good solid mold. I've tried to estimate a good volume of clay so that as I smooth it out the level will rise nicely to just below the edges of the part.


Using this set of tools:

from here (click on the "set of 12" thumbnail, it's the better set but has no direct link), I smoothed out the clay and worked it up snug against the edges of the part and the walls of the box. The RTV (Room Temperature Vulcanizing) rubber will work its way into the smallest spaces so a good seal is necessary. After that I built up the walls of the box with another row of bricks and laid in a thin snake of clay around the walls to raise the level a little more there.


Then I added one more layer of Legos so the RTV has enough space.


Here's the demolded RTV. I didn't use any mold release, which was fine in this case. I was nervous tho' because I did that by accident, not on purpose.


For the casting, I decided to use Bondo auto body repair filler. I was inspired to do this by a Brazilian figure sculptor on Hobbyfanatics named Ryuji who uses this stuff all the time. It's way cheaper than urethane or epoxy resins and the supply is much handier at the auto supply store (casting resin is a bit hard to find, even on the internet). I did spray mold release before spreading the Bondo into the mold.


The first one I did wasn't even worth showing because the working time on this Bondo stuff is only about a minute, which came as a big surprise and ruined the first attempt. This is the second attempt:

There are too many defects in this part to make it worth using on the final product, so I tried a few more times.

Here's what I came up with. The second and fourth ones are fine.


Now I just have to trim it up and smooth out the flat backside so I can fix it onto the flat foot and the prime and paint.

Wish me luck!


Wednesday, May 30, 2007

Vatshu Ankle Joint Modifications

I'll break it down for you. First I carved out some of the plastic that was there to hold the original stupid poly cap:

Until the new socket PC fit nicely, but loosely at the level where I wanted it:

Then I laid down a little "pad" of Magic Sculp epoxy putty for the new PC to press into:

And after the PC was mounted at the right depth and angle, I filled in the surrounding area with more Magic Sculp using clay sculpting tools to press and work it smoothly into place:

These are the "ankle bones" that connect the top of the foot to the bottom of the leg:

So now the ankles will be essentially double jointed.

Look at these videos for a more well-rounded view of all the action (ignore the sound, please):


Once again the main idea here is that test fitting is of the utmost importance in Garage Kit building. Even more so if you want to do modifications.


Saturday, May 5, 2007

More on Vatshu

I got the shoulder armor cleanup done.

First the inside of that piece from the last post:


And around the edges:


I got the final priming and sanding done on the smaller inner layer of shoulder armor too. I feel like I'm finally getting a handle on this whole elimination of seams thing.

Here's an animated gif of those inner armors:

I don't know if the gif will work, so here are the individual images:


Thursday, May 3, 2007

Vatshu cleanup

Working on the shoulder armors.

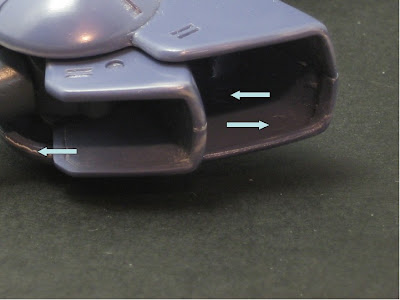
I realized that the insides of these big panels were hugely exposed and needed smoothing out. Lucky for me I hadn't glued them together yet (hooray for test fitting). Here's what I'm talking about:

If you look inside there you can see little circles, pointed out on the right side in this pic (you might need to angle your monitor down to see it):

The arrow on the left is pointing out a rough edge I'll need to polish too.

On this pic you can see what this part looks like before and after smoothing out:


and here's a little movie, with actual narration no less, that shows you how to quickly and relatively painlessly clean up parts that show their "wrong" sides like this and other shoulder armors so often do:


Even if I was doing "no-paint" this would look good now. But I'm painting this time around, so stay tuned :)


Sunday, March 25, 2007

Vatshu marches on

Here's a few more illustrations of the Vatshu project

Adding the inner shoulder joint.

This is the rather large gap between the parts caused by inserting the poly cap (notice that the parts are also misaligned, again because of the poly cap):


This is the two halves split apart and the dremel bit I used to open up the poly cap bracket just a bit (taking care to do so in such that the parts will align better too):


Then the halves fit much better, but now there's a problem in that this sub-assembly fits too tightly onto the top of the upper arm. This hole needs to be a nice clean circular one, not a ragged oval:

So here's a little clip of me rolling up a tiny snippet of sand paper to reshape the hole:


Inserting the tube into the hole to smooth it out:


At last, done with all the test-fitting and touch-ups:


So I can glue stuff together:


Wednesday, March 7, 2007

Skirt armor on the Vatshu

The front plates of skirt armor


A closer view of the detailed edge of those same plates (one is raw off the sprue)


The rounded armor for the sides of the skirt


Very small springs hold the skirting onto the waist unit (at least they will eventually)


Saturday, March 3, 2007

More work on Vatshu

Working on one of the arms...

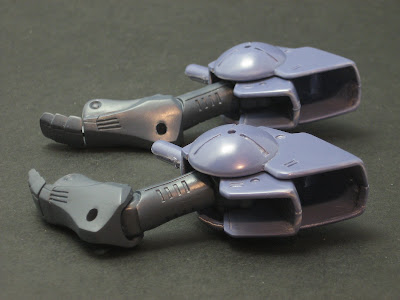
This is the wrist guard/armor, there are two of them since the mech has two arms that are just alike. On the left is one of them fresh off the sprue, on the right is after I cleaned it up and reshaped it a little with a needle file:


The "before" piece is one the right this time:


The underside, "before" on the left:

From the side, "before" on the left:

And here's the part test-fitted onto the arm:

Friday, February 16, 2007

Ban Dai wants you to scratch build

Well, maybe not, but they sure seem to be pretty hot to give us plenty of extra poly caps with their kits.

It's clear that they have a number of standard sets of poly caps that they put with all their kits. You will almost never use every one off the rack that is included with whatever kit you bought.

DO NOT THROW THESE OUT!

If you feel the urge to throw them out, send them to me instead. Just put them in an envelope with a couple stamps on it.

The 10 year old Vatshu IP kit I'm working on right now has the worst joint design I've ever seen. The knees are pretty nice, but that's about it.

Mecha joints should imitate human joints, because human joints (and those of other fellow vertebrate animals) are awesome. This means BALL JOINTS for hips and shoulders, and also - for simplicity's sake - for wrists and ankles.

This Vatshu kit just uses different sizes of side-pinned tubes, and they don't even fit well in most of the locations sculpted for them (except in the lovely knees, we all know side-pinned tubes make nice tight knee joints).

Thank heavens I save left over polycaps.

I found two lovely pairs of tabbed cup polycaps that I'll be using for the hips and ankles on this kit with a little puttying work, much of which I would have had to do anyway just to get the bad caps to stop flopping around.

Still mulling over the best way to sculpt the balls to fit into the cups, but I've done this before so I just have to figure out if the way I did it before was the best way or if there might be something easier. I'm not always so great at coming up with solutions that are both functional AND simple.

Wednesday, February 14, 2007

Vatshu The Black Knight

Several years back there was a Cantonese noodle shop on one of the main streets here in town. Wong Faye played on the sound system and in the front of the restaurant crammed into a tiny space - the way they do it in the micro-malls in Manhattan's Chinatown - was a little import toy "shop" with only enough room in it for the owner to sit and watch HK action movies on a tiny monitor. I used to love checking out the windows for the latest MG Gundams, mini figure sets and bootleg DVDs.

This was the spot where I bought my first garage kit, though I didn't know it was a garage kit at the time. Back then I thought all models were like the Star Wars and Battlestar Galactica ones I had sat in the basement building as a kid. Those kits, I'm guessing now in hindsight, were made in factories that churned out huge quantities for a low-priced children's market.

Garage kits are not like this.

I just recently learned that one of the bigger garage kit workshops in Japan has a grand total of 15 employees.

Ban Dai - the maker of all those Gundam kits - employs hundreds.

Anyway, that first kit was a Volks GGI/MM (Great Garage Injection/Mechanical Moving) EVA-01 kit that was, as I later found out, infamously difficult to build. Leave it to me to make my return to my childhood hobby with something this tough.

It took me about six months of pretty hard effort to build it (and this was back before I became a father and had much more free time for building). Admittedly I did some crazy, time consuming stuff like freezing the foot and leg parts into blocks of ice so that I could fill the hollows with smelted lead solder without deforming the plastic (I've since discovered lead bird shot, most recently of the #12 variety.Get yourself a lifetime supply for about $35.

Well, that brings me to this kit that I've just started building: a WAVE kit from 1997 that I bought at a good discount from that little shop-in-a-restaurant when it was going out of business. I got some nice little L-Gaim kits there too for less than what dirt costs.

A real blast from the past - this kit really shows its age, especially compared to the mostly very nice and straightforward gold-plated Knight of Gold Joker 3100 kit I built last month.

On with the show...

If I don't feel bound to follow the instruction manual (like I do when I build MG Gundams, which remind me of higher-priced Lego kits in their shared complexity and the disasters that can result if you"skip ahead" ) then I like to start from the ground up. So here's the first look at the feet:


A big part of garage kit work is figuring out what to do with the parts. The instruction book is perfectly serviceable, but it leaves out all the details required to turn out an end product that doesn't look like trash:


Another thing I noticed:


These 4-sided manicure kit nail-file blocks from the cosmetics aisle are stupid fresh:


And with the right tools it doesn't take much to make a big difference:


And on the subject of tools, the Dremel will now make its first appearance:


And now that the parts have been satsfactorily prepared I can fill the hollows of the foot with lead shot:


And seal it in place with cyanoacrylate glue:


After the glue set up, which wasn't long, I glued the 3 main foot pieces together with solvent glue.

I think this one is going to turn out nicely.

Come back soon for another set of videos.