Wednesday, December 19, 2007

santa claus is on his way

OK, so this is SO not anything to do with mecha, but it is a sculpture project I'm working on right now. So I'm posting an image here, if only to let anyone who actually reads this blog know that I am working on SOMETHING.


And furthermore, I will be cleaning this up then making a few molds and casting copies of this over the next few days. So that'll give you a chance to walk through a simple moldmaking and casting process. I'll shoot some video so you can see the finer points of RTV and resin mixing and pouring in a flat one-sided mold.


Tuesday, December 4, 2007

New Custom Vinyl

Last Friday there was a custom toy show at my local comic shop, the Vault of Midnight

Here are a couple of pics of my contribution:


Sunday, November 4, 2007

More Painting on the Tachikoma

Doing some texturing on the body of the Tachikoma with Mr. Surfacer 500.

And putting some color onto the "eyes" or "sensors" or whatever complicated technical name I'm sure Shirow made up for them. For details on the paints used for the finish (which looks even more interesting in person) watch the video below.


Saturday, November 3, 2007

Some Primering

I sprayed some Mr. Surfacer 1000 on some parts of the Tachikoma and now it looks a little something like this:


Thursday, October 4, 2007

I'm Back!

There's nothing like a little severe personal crisis to come between a man and his hobby. Been close to 3 months now.

Well, the Helmine feels a bit overwhelming at the moment - both technically and financially speaking. But I still have a closet shelf full of lovely kits.

Here's the intro to a simple one I started work on this week.

I'm hoping I can sandwich some priming in between various other exciting activities this weekend.


Friday, July 13, 2007

Volks 1/100 Helmine


I got this kit from Yahoo Japan Auctions by way of the proxy bidding and "deputy" service website Shopping Mall Japan in the neighboring state of Indiana. Including all the service and shipping fees it cost just over $250.

This is the front page of the typically bare-bones instruction sheet.


And here's a picture of all its 47 parts laid out in the classic resin kit part layout "pose."


I'm not entirely sure whether or not this kit was worth all the money I paid, but I do like the design which is a kind of Five Star Stories "cousin" to the Gundam known as Qubeley.


Since the kit is about 20 years old, it is a pretty bad cast. Lots of pinholes or bubbles that were trapped and hardened into the plastic resin. Some mold misalignment causing damage to details or the design of the original sculpt. Some bigger bubbles that just completely wiped out details.

Those who know me, however, will know that I (perhaps perversely) enjoy repairing and resculpting parts on bad kits to make them better. This is what I will be doing in this case, and now I will take it a step further and re-cast the kit when the parts are up to standards that should improve considerably upon the original. I don't feel like I'm stepping on anyone's marketplace toes with this. The kit is really old, as I said, and very few people even know that it exists at all.

I'm well into the repair process already and I want to share some of it with you.

First up is a youtube video of before and after work on the big shoulder armors:


Next are before and after pics of repair I did to the point of the helmet's horn which was lost in the casting process:


Here is a video of the process for the resculpt.

[Edit] BTW I just found out that I've been mispronouncing the name "Helmine." It is German (duh to self) and short for Wilhelmine so it should be pronounced as "hell-mee-nuh". It means "the resolute protector" which I think is nice.

Saturday, July 7, 2007

ACen Kit Building with Kids

Put this off for too long ...

The model building for kids thing I did at Anime Central went really great. The kids all loved it and we had a great time together. Thanks HLJ!

Here's a few pics.


The staff at the con said my presentation had the biggest turnout of anything they'd done for the kids but even so the turnout wasn't huge, so I had about a dozen kits left and I'll be doing it again next year with the leftover kits (now safely in storage).


Monday, June 4, 2007

Finally figured out the foot detail casting!

After my first attempt went awry thanks mainly to resin that was well-past its expiration date, I decided to make a new mold with RTV.

Here's the mold box getting started. I've just roughly lumped in the Kleen Clay to hold the part in position so that it is level in the box, and has enough space on all sides to make a good solid mold. I've tried to estimate a good volume of clay so that as I smooth it out the level will rise nicely to just below the edges of the part.


Using this set of tools:

from here (click on the "set of 12" thumbnail, it's the better set but has no direct link), I smoothed out the clay and worked it up snug against the edges of the part and the walls of the box. The RTV (Room Temperature Vulcanizing) rubber will work its way into the smallest spaces so a good seal is necessary. After that I built up the walls of the box with another row of bricks and laid in a thin snake of clay around the walls to raise the level a little more there.


Then I added one more layer of Legos so the RTV has enough space.


Here's the demolded RTV. I didn't use any mold release, which was fine in this case. I was nervous tho' because I did that by accident, not on purpose.


For the casting, I decided to use Bondo auto body repair filler. I was inspired to do this by a Brazilian figure sculptor on Hobbyfanatics named Ryuji who uses this stuff all the time. It's way cheaper than urethane or epoxy resins and the supply is much handier at the auto supply store (casting resin is a bit hard to find, even on the internet). I did spray mold release before spreading the Bondo into the mold.


The first one I did wasn't even worth showing because the working time on this Bondo stuff is only about a minute, which came as a big surprise and ruined the first attempt. This is the second attempt:

There are too many defects in this part to make it worth using on the final product, so I tried a few more times.

Here's what I came up with. The second and fourth ones are fine.


Now I just have to trim it up and smooth out the flat backside so I can fix it onto the flat foot and the prime and paint.

Wish me luck!


Wednesday, May 30, 2007

Vatshu Ankle Joint Modifications

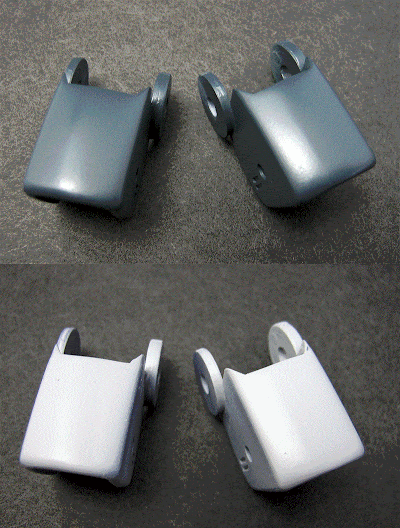
I'll break it down for you. First I carved out some of the plastic that was there to hold the original stupid poly cap:

Until the new socket PC fit nicely, but loosely at the level where I wanted it:

Then I laid down a little "pad" of Magic Sculp epoxy putty for the new PC to press into:

And after the PC was mounted at the right depth and angle, I filled in the surrounding area with more Magic Sculp using clay sculpting tools to press and work it smoothly into place:

These are the "ankle bones" that connect the top of the foot to the bottom of the leg:

So now the ankles will be essentially double jointed.

Look at these videos for a more well-rounded view of all the action (ignore the sound, please):


Once again the main idea here is that test fitting is of the utmost importance in Garage Kit building. Even more so if you want to do modifications.


Monday, May 28, 2007

Vatshu footage

Those who have been with me for a while will remember this:


Well, after much deliberation and a failed attempt or two, I think I've figured out
how to succeed.

I'm making a mold of the bottom of the foot from my 1/144 KOG Patraqushie starting with this stuff:

and bulding up about 8 layers.


I used a blowdryer to get the layers built up quickly, then through a supreme effort of will I let it cure overnight.

Now take a look at the results:


The latex took the detail pretty nicely:


Come back later for the resin casting experience.


Friday, May 18, 2007

2 mods on Vatshu

hip joint are now ball joints instead of floppy side-pinned tubes.


and I filled in a significant portion of the gaping holes at the sides of the chest.


Sunday, May 6, 2007

SD Gunner Zaku Lunamaria Hawke custom


I built this little guy last night to get ready for an intro to model building presentation I'm running with for a roomful of kids at Anime Central in Chicago next weekend.

I shot video of every part of every step of the assembly process so the kids can see first hand how it's done and then do it for themselves.

I feel like I really had a breakthrough in terms of using the camera as my eyes. I stood behind the camera with my magnifying visor on so that that little camera LCD monitor didn't seem quite so small.

It still eliminated the main cues (you know, 3D binocular vision) I use for depth perception, though, and that's always been the hardest part for me about shooting close up modeling vids. I always feel like my hands are just swimming around in space and I constantly want to peek over or around the camera to be able to see what I'm doing "with my own eyes" as it were.

I worked really hard to get the lighting decent and I think that helped alot, as did the magnifying visor. Here are two of the videos from late in the process:

Final Stage of building the BFG:

and mounting the BFG onto the Zaku:


Saturday, May 5, 2007

More on Vatshu

I got the shoulder armor cleanup done.

First the inside of that piece from the last post:


And around the edges:


I got the final priming and sanding done on the smaller inner layer of shoulder armor too. I feel like I'm finally getting a handle on this whole elimination of seams thing.

Here's an animated gif of those inner armors:

I don't know if the gif will work, so here are the individual images:


Thursday, May 3, 2007

Vatshu cleanup

Working on the shoulder armors.

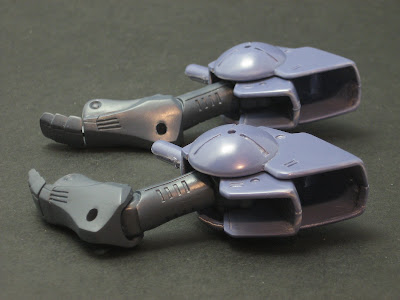
I realized that the insides of these big panels were hugely exposed and needed smoothing out. Lucky for me I hadn't glued them together yet (hooray for test fitting). Here's what I'm talking about:

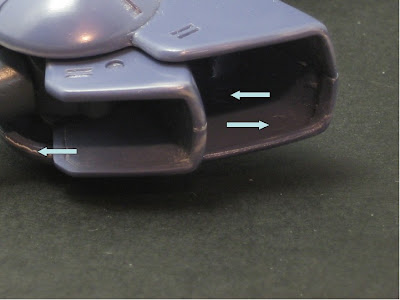
If you look inside there you can see little circles, pointed out on the right side in this pic (you might need to angle your monitor down to see it):

The arrow on the left is pointing out a rough edge I'll need to polish too.

On this pic you can see what this part looks like before and after smoothing out:


and here's a little movie, with actual narration no less, that shows you how to quickly and relatively painlessly clean up parts that show their "wrong" sides like this and other shoulder armors so often do:


Even if I was doing "no-paint" this would look good now. But I'm painting this time around, so stay tuned :)


Thursday, April 26, 2007

From the ridiculous comes the sublime

I want to take a break from doing difficult and complicated kits.

On Hobbyfanatics some of us have been having a back-and-forth about metallic gold finishes on our kits, and it got me itching to try my hand at doing a pristine airbushed gold finish on a kit.

So I remembered this ancient kit I picked up at a con last year. I practically fell over on the tiled concrete floor when I saw this thing in one of the little exhibitor stalls. It's KING JOE from Ultra Seven!


It's clearly Chinese in origin, but it does have a foil sticker showing the Tsuburaya seal of licensing approval. I'm guessing it's between 20 and 30 years old. It only has 10 parts, a couple of which don't even appear on the instruction sheet, so I'll have to figure that one out.


It also has this:


Yes, it's a windup toy!

I'll be posting again soon with a video of the test-fit stage in walking (staggering?) action.


Monday, April 16, 2007

ACen presentation

Check out the link here for more info about my panel at Anime Central next month.

Tuesday, April 10, 2007

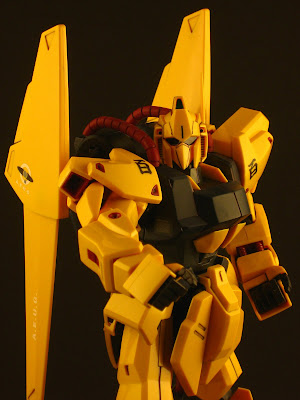
Hyaku Shiki!

No decals/stickers yet. I put those on last night and need to make a few final adjustments. Final pictures soon.


One legged (I was detailing the other leg).